What is VisualEffect?
UIVisualEffectView gives you Apple’s frosted-glass blur — but only at the fixed intensities Apple ships (.systemThinMaterial, .regular, and friends). There is no public blurRadius you can set to 3.7, and no clean way to animate the blur from sharp to frosted and back. Every workaround people reach for (swapping effect styles, UIViewPropertyAnimator tricks, masking two snapshots) fights the framework.
VisualEffect takes a different route. It keeps the one thing only a real UIVisualEffectView can provide — the live backdrop capture of whatever is behind it — strips away Apple’s fixed blur, and applies its own blur and colour adjustments under full animation control. You get a fully animatable, variable backdrop: seven effects (blur, brightness, contrast, saturation, grayscale, hue rotation, opacity), an implicit spring on every change, and a gesture-driven interactive API. You drive all of it from UIKit or SwiftUI.
Its headline use is a variable blur along a scrolling edge — a progressive blur that’s strong at the screen edge and fades to nothing as content moves behind it, the effect you’d otherwise build with CIFilter.maskedVariableBlur — which we’ll build first.
It’s open-sourced at github.com/DerNoah/swift-visual-effect (iOS 17+, Swift 6, MIT).
 The backdrop we’ll apply every effect to throughout this guide.
Install it with Swift Package Manager:
dependencies: [
    .package(url: "https://github.com/DerNoah/swift-visual-effect", from: "1.0.0")
]
import VisualEffect
The core trick: an empty backdrop view
A UIVisualEffectView’s blur isn’t drawn by you — it’s a set of Core Animation filters Apple attaches to a private backdrop layer (the view’s first sublayer), which continuously samples whatever sits behind the view. VisualEffect instantiates a normal blur view, then reaches into that layer and removes the filters, leaving the backdrop capture but none of Apple’s processing:
public final class EmptyVisualEffectView: UIVisualEffectView {
    public init() {
        super.init(effect: UIBlurEffect(style: .systemUltraThinMaterial))
        removeAllFilters()
        registerForTraitChanges([UITraitUserInterfaceStyle.self]) { (self: Self, _) in
            DispatchQueue.main.async { self.removeAllFilters() }
        }
    }

    private func removeAllFilters() {
        if let filterLayer = layer.sublayers?.first {
            filterLayer.filters = []   // drop Apple's blur/tint, keep the backdrop pass
        }
    }
}
The trait-change handler re-strips the filters whenever the user switches light/dark mode, because the system reinstalls them at that point. (The re-strip is dispatched to the next main-thread tick so it runs after UIKit finishes putting them back.)
What’s left is a neutral, transparent surface that still knows what’s behind it — and crucially, that backdrop is captured live, every frame. SwiftUI’s .visualEffect { … } modifier (new in iOS 17) then applies the package’s own blur and colour filters on top, and SwiftUI owns all the interpolation. Your code never animates anything directly; it only sets values, and SwiftUI’s animation engine tweens them.
That “live backdrop” property is the whole reason the next section works.
The primary use case: a variable blur on a scrolling edge
The fashionable way to treat the top and bottom of a scroll view is a variable blur — a blur that is strong at the very screen edge and fades to nothing toward the centre, so content gently dissolves into the status-bar and home-indicator areas instead of colliding with a hard line. On its own, Core Image gives you CIFilter.maskedVariableBlur: you hand it an image and a grayscale mask, and it varies the blur by the mask. But that’s a per-frame Core Image render over a static image — awkward to animate and to run live over scrolling content.
VisualEffect gives you the same look with none of that. The blur it applies is uniform, so the variable part comes from masking the live-backdrop view with a gradient — .mask(LinearGradient(...)) in SwiftUI, or a CAGradientLayer in UIKit. The result updates live as content scrolls, animates like any other SwiftUI view, and never round-trips through Core Image.
The blur and the fade stay pinned to the edges while the feed scrolls. Toward each edge a card progressively blurs and then dissolves into the wallpaper; the centre stays sharp and fully opaque.
The effect is two gradient masks, both confined to the edges:
- The variable blur — a
VisualEffectView(orVisualEffectViewRepresentable) pinned to the edge, masked by a gradient so the blur is full at the very edge and gone toward the centre. This is theCIFilter.maskedVariableBlurreplacement. Use the backdrop view here, not.visualEffects(_:): the backdrop view blurs whatever is behind it (the scrolling content), whereas.visualEffects(_:)blurs a view’s own content. - The content edge fade — a
LinearGradientmask on the scroll content itself, so its top and bottom edges become clear while the centre stays fully visible. The content dissolves into whatever sits behind it (here, a blurred wallpaper).
Size each band to the matching safe-area inset (top larger than bottom), and let the gradient span the whole band — the fade begins at the blur view’s inner edge (where it meets the content) and completes at the screen edge, so there’s no hard plateau, just one soft ramp. Keep the blur modest — a blurRadius of 8 gives a clearly frosted edge while the dissolve carries the rest. And keep clippedBlur at its default false with negative blurInsets on the pinned edge, so the blurred surface bleeds past the bounds and reads solid right up to the notch / home indicator — no darkened rim.
SwiftUI — a wallpaper, the masked scroll content, and a gradient-masked blur on each edge:
ZStack {
    // 1. A blurred wallpaper the content dissolves into.
    Image("photo")
        .resizable().scaledToFill()
        .blur(radius: 32)
        .overlay(Color.black.opacity(0.1))
        .ignoresSafeArea()

    // 2. The scroll content, faded to clear across each safe-area band — clear at the
    //    screen edge, fully opaque at the blur view's inner edge (one ramp, no plateau).
    ScrollView {
        LazyVStack(spacing: 12) { /* your cards */ }
    }
    .mask(
        VStack(spacing: 0) {
            LinearGradient(colors: [.clear, .black], startPoint: .top, endPoint: .bottom)
                .frame(height: 54)               // top band: clear at the screen edge → opaque inward
            Color.black                          // centre — fully visible
            LinearGradient(colors: [.black, .clear], startPoint: .top, endPoint: .bottom)
                .frame(height: 34)               // bottom band: opaque inward → clear at the screen edge
        }
    )

    // 3. The variable blur — a gradient-masked backdrop view on each edge, the gradient
    //    spanning the whole band: full blur at the screen edge, fading to none at the inner edge.
    VStack {
        VisualEffectViewRepresentable(
            blurInsets: UIEdgeInsets(top: -40, left: -40, bottom: 0, right: -40),
            initialValues: VisualEffectValues(blurRadius: 8)
        )
        .frame(height: 54)                       // ≈ the top safe-area inset
        .mask(LinearGradient(colors: [.black, .clear], startPoint: .top, endPoint: .bottom))
        .ignoresSafeArea(edges: .top)

        Spacer()

        VisualEffectViewRepresentable(
            blurInsets: UIEdgeInsets(top: 0, left: -40, bottom: -40, right: -40),
            initialValues: VisualEffectValues(blurRadius: 8)
        )
        .frame(height: 34)                       // ≈ the bottom safe-area inset
        .mask(LinearGradient(colors: [.clear, .black], startPoint: .top, endPoint: .bottom))
        .ignoresSafeArea(edges: .bottom)
    }
}
UIKit — same idea with a CAGradientLayer set as the layer mask. Pin a VisualEffectView to the edge, and in layoutSubviews size a gradient layer to its bounds and assign it to effectView.layer.mask:
let topBlur = VisualEffectView(
    blurInsets: UIEdgeInsets(top: -40, left: -40, bottom: 0, right: -40),
    initialValues: .blurredIn
)
let gradient = CAGradientLayer()
gradient.colors = [UIColor.black.cgColor, UIColor.clear.cgColor]   // opaque at the edge → clear
gradient.startPoint = CGPoint(x: 0.5, y: 0)
gradient.endPoint   = CGPoint(x: 0.5, y: 1)
topBlur.layer.mask = gradient
// in layoutSubviews: gradient.frame = topBlur.bounds

// Mask the scroll view's content the same way to fade its edges to clear.
Because each effect view holds a VisualEffectState, the blur is fully animatable — fade it in as the user starts scrolling, for instance — using the techniques in the rest of this guide. That’s the part CIFilter.maskedVariableBlur can’t give you for free.
Basic usage in SwiftUI
To blur a view’s own content (rather than a backdrop behind it), wrap it with the .visualEffects(_:) modifier and drive a single observable state object:
import SwiftUI
import VisualEffect

struct GalleryView: View {
    @State private var effect = VisualEffectState()

    var body: some View {
        PhotoGrid()
            .visualEffects(effect)          // apply the effect to this view
            .onTapGesture {
                effect.values = .blurredIn  // blur the whole grid
            }
    }
}
VisualEffectState is an @Observable class that holds a VisualEffectValues struct — the full set of animatable parameters. Each one has a neutral default, so VisualEffectValues() renders nothing at all:
public struct VisualEffectValues {
    public var blurRadius: CGFloat   // 0  = no change
    public var brightness: CGFloat   // 0  = no change (additive)
    public var contrast: CGFloat     // 1  = no change
    public var saturation: CGFloat   // 1  = no change  (0 = greyscale)
    public var grayscale: CGFloat    // 0  = no change  (1 = fully grey)
    public var hueRotation: CGFloat  // degrees, 0 = no change
    public var opacity: CGFloat      // 1  = opaque
}
Set them individually or all at once:
effect.values.blurRadius = 6
effect.values = VisualEffectValues(blurRadius: 6, saturation: 1.4)
The next section walks each parameter on its own.
The seven effects
Each effect below is one field on VisualEffectValues. The images show each applied in isolation to the photo above.
Blur — blurRadius is a Gaussian blur radius in points. This is the headline effect and the basis of the .blurredIn preset (radius 6):
effect.values.blurRadius = 6
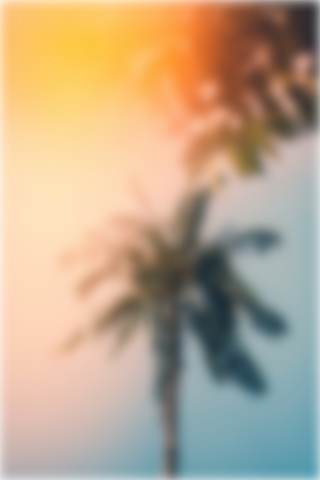
blurRadius: 6 — the frosted backdrop.
Brightness — additive, in normalized 0–1 space. 0 leaves the image unchanged; positive values lift every channel toward white:
effect.values.brightness = 0.18
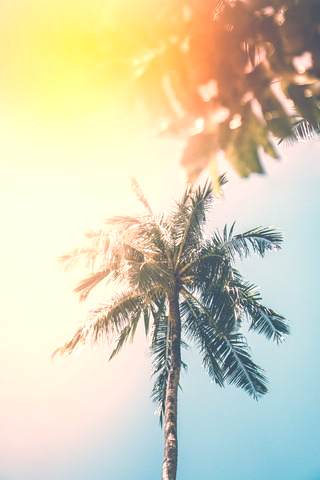
brightness: 0.18 — every channel lifted; highlights bloom toward white.
Contrast — a multiplier around mid-grey. 1 is unchanged; above 1 pushes lights lighter and darks darker:
effect.values.contrast = 1.4

contrast: 1.4 — tones pulled apart around the midpoint.
Saturation — 1 is unchanged, 0 is fully greyscale, and above 1 is more vivid:
effect.values.saturation = 1.8

saturation: 1.8 — richer, more vivid colour.
Grayscale — a blend toward luminance. 0 is unchanged, 1 is fully grey. Unlike saturation: 0, it’s a partial desaturation you can dial:
effect.values.grayscale = 0.85
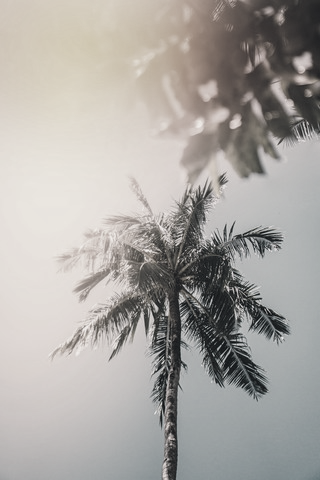
grayscale: 0.85 — mostly grey, a hint of colour remaining.
Hue rotation — rotates every colour around the wheel, in degrees. A large value is dramatic; small values tint subtly:
effect.values.hueRotation = 90
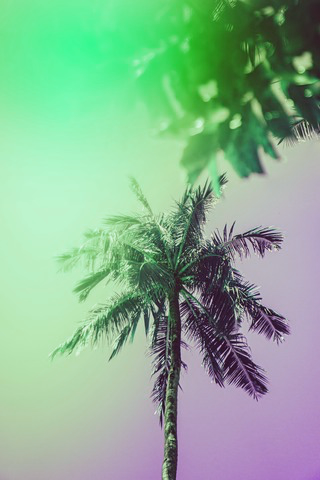
hueRotation: 90 — every hue shifted a quarter-turn around the colour wheel.
Opacity — 1 is opaque; below that, the surface becomes translucent and the sharp content behind it shows through. It only reads against a background, so here it’s shown as a frosted card laid over the photo:
effect.values.opacity = 0.75
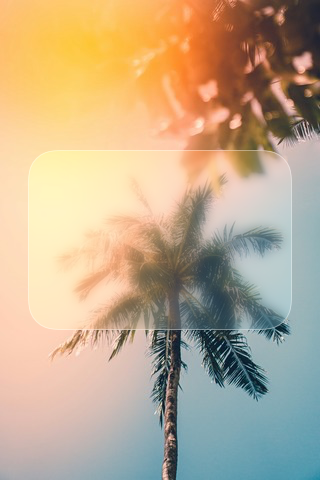
opacity: 0.75 — the frosted panel goes translucent and the sharp photo bleeds through.
Composing a frosted-glass surface
The real use case combines a few of these into a single panel — a blurred backdrop, a touch of brightness to give the glass some lift, and a little extra saturation so colour doesn’t wash out:
effect.values = VisualEffectValues(
    blurRadius: 6,
    brightness: 0.10,
    saturation: 1.4
)
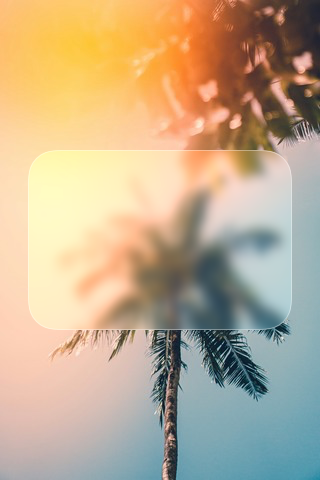 Blur + brightness + saturation, clipped to a rounded card — the canonical frosted panel.
Two knobs control how the blur meets the edges of the surface:
clippedBlur(defaultfalse). Whenfalse, the rendered blur is allowed to bleed slightly past the view’s bounds — the layer’s content is expanded with negative padding so the frosted edge looks soft rather than cut off (this is what the pinned bars above rely on). Set it totrueto clip the effect crisply to the bounds, which is what you want for a card with hard rounded corners.blurInsets(on the UIKitVisualEffectView). Insets — typically negative — applied to the rendering surface so the blur samples a little beyond the view’s frame, avoiding a darkened rim at the edges.
effect.clippedBlur = true
Animating the effect
Here’s the payoff of letting SwiftUI own the rendering: you never write an animation. The effect layer attaches an implicit spring keyed on the value struct, so any assignment to values animates automatically:
// internally, the layer applies:
//   .animation(.spring(duration: state.animationDuration, bounce: 0.1), value: values)

effect.animationDuration = 0.45      // tune the spring (default 0.45)
effect.values = .blurredIn           // sharp → frosted, spring-animated
Two presets bookend the common case:
public static let blurredIn  = VisualEffectValues(blurRadius: 6)   // frosted
public static let blurredOut = VisualEffectValues()               // neutral / clear
Assigning .blurredIn springs the blur from 0 to 6 — note the slight overshoot before it settles.
Interactive dismissal with fractionComplete
The spring is perfect for taps, but image viewers need the blur to track a finger. For that, VisualEffectView exposes a UIViewPropertyAnimator-style scrubbing API — except there’s no animator, just SwiftUI values you set directly.
let effectView = VisualEffectView()
effectView.frame = view.bounds
view.addSubview(effectView)

effectView.blurIn()   // animate to .blurredIn to start
A pan gesture then drives the dismissal:
@objc func handlePan(_ gesture: UIPanGestureRecognizer) {
    let translation = gesture.translation(in: view).y
    let progress = min(1, max(0, translation / 200))   // drag 200pt = fully clear

    switch gesture.state {
    case .began:
        effectView.beginInteractive()              // snapshot the current values
    case .changed:
        effectView.fractionComplete = progress     // 0 = full blur, 1 = none
    case .ended, .cancelled:
        effectView.pauseInteractive()              // commit the current frame
        if progress > 0.4 {
            effectView.finishInteractive()         // ease out to .blurredOut
        } else {
            effectView.cancelInteractive()         // spring back to the snapshot
        }
    default:
        break
    }
}
What each call does:
beginInteractive()snapshots the current values as the “full blur” endpoint and cancels any in-flight spring, pinning the surface exactly where it is.-
fractionComplete(0= full blur,1= no blur) is written every frame of the pan with no animation, so it follows the finger instantly. It interpolates from the snapshot toward neutral —blurRadius,brightness, andsaturationall ease out together:blurRadius = start.blurRadius * (1 - p) brightness = start.brightness * (1 - p) saturation = 1 + (start.saturation - 1) * (1 - p) pauseInteractive()forces a synchronous render (layoutIfNeeded()) so the animation you start next begins from exactly where the gesture left off — the SwiftUI equivalent ofUIViewPropertyAnimator.pauseAnimation().finishInteractive()eases the rest of the way out to.blurredOut(a commit).cancelInteractive()springs back to the snapshot (an abort).
Driving fractionComplete from 0 to 1 and back — blur, brightness, and saturation interpolate together as the value scrubs.
blurOverridesOpacity: dismiss without a hard frame
There’s a subtle problem with animating a blur all the way to zero: at radius 0 you’d briefly show a perfectly sharp frame before the view is removed — a visible pop. VisualEffect avoids it with the blurOverridesOpacity flag (default true), which clamps the rendered blur and fades the surface out instead:
effectiveBlur  = max(1, blurRadius)   // never render a fully-sharp pass-through
derivedOpacity = min(1, blurRadius)   // below radius 1, fade out via opacity
So as blurRadius drops from 1 to 0, the surface stays blurred at radius 1 while its opacity falls to zero — it dissolves over the sharp content beneath rather than snapping into focus.
With blurOverridesOpacity, the frosted layer fades away below radius 1 — no sharp flash on dismissal.
UIKit usage
You don’t need SwiftUI to use VisualEffect. VisualEffectView is a plain UIView you can drop into any view controller; under the hood it hosts the SwiftUI effect layer for you. It plays nicely with UIView.animate, because the convenience setters just write to the underlying state and SwiftUI tweens the result:
let effectView = VisualEffectView(blurInsets: .zero, initialValues: .blurredOut)
effectView.frame = view.bounds
view.addSubview(effectView)

UIView.animate(withDuration: 0.4) {
    effectView.blurRadius = 10        // animates via the implicit spring
}
blurRadius, saturation, and brightness have direct properties; for the rest, set the whole struct through effectValues:
effectView.effectValues = VisualEffectValues(blurRadius: 6, grayscale: 0.4, hueRotation: 20)
Tips
| Tip | Why |
|---|---|
For a backdrop blur, use the backdrop view, not .visualEffects |
VisualEffectView / VisualEffectViewRepresentable blur what’s behind them; .visualEffects(_:) blurs the view’s own content |
| Make a variable blur with a gradient mask | Mask a pinned backdrop view with a LinearGradient / CAGradientLayer for a live, animatable CIFilter.maskedVariableBlur — no Core Image round-trip |
Use negative blurInsets on the pinned edge |
The blurred surface bleeds past the bounds so it reads solid to the notch/home indicator, with no darkened rim |
Keep one VisualEffectState per surface |
It’s the single source of truth the effect layer observes; share it between your UIKit/SwiftUI code and gesture handlers |
| Let SwiftUI own the interpolation | Never wrap value changes in your own animator — assign values and the implicit spring handles it |
Prefer blurOverridesOpacity for dismissals |
It fades the surface out below radius 1 instead of flashing a sharp frame |
Call beginInteractive() before scrubbing |
It snapshots the endpoint fractionComplete interpolates from; without it the scrub has nothing to interpolate against |
pauseInteractive() between gesture and animation |
Commits the current frame so finishInteractive()/cancelInteractive() start from where the finger left off |
Tune animationDuration, not the curve |
One knob controls the implicit spring’s duration; the bounce is fixed at a gentle 0.1 |
The full source — and a deeper look at how the SwiftUI layer is wired to the stripped-down backdrop view — is on GitHub: github.com/DerNoah/swift-visual-effect.